Friday 22 March 2013

Batts, Fluff and Stuffs!

I had completely forgotten I had this blog but was reminded about it today so here I am!  This came about as I was in my local yarn shop (LYS) Truly Twisted talking about how to record my crafty attempts.  In that moment I remembered this blog and thought it was good way to record what I am doing, so here I am.

I recently started to learn to spin, a friend in my knitting group kindly let me borrow her spare wheel so I bought some merino fluff from Truly Twisted and off I went.  The wheel is an Ashford Traditional and only has one ratio of 6.5 but I am having so much fun!  I haven't taken any pics etc of my first few attempts, but I am here now.

Last week I took all my odd little bits of merino that I had leftover from my initial learning attempts and made some batts on the drum carder in the shop.  Sue (from Truly Twisted) showed me how to make rolags and I went on my merry way.  Once home I was very happy doing a nice little inch worm forward draft, but I remebered that Sue also had shown me longdraw.

Now the thing is, when I look around on Ravelry a lot of people seem to suggest that this is an advanced technique and is difficult.  Being me I didn't listen and decided to give it a go, and was quite happy that I didn't mess it up and that I actually got yarn!  To be honest that's putting it mildly, I was practically jumping for joy, I could happily longdraw all day!!!!!Will post some pictures of that on another day.

So having had so much fun trying longdraw and having used up the batts I took up some fluff I had and went back to the shop and made more batts today.

So here are some pictures of the batts I made today, 5 of them.  Will make some more rolags and try out some more longdraw.

batt 03

batt 01

Batt 03

Batt 04

Have Fun!!!


Tuesday 10 May 2011

Socks That Itch!

I finished my socks a couple of weeks ago, but I only just realised I had not posted them, doh!  What is most upsetting is that they fit perfectly, the colours match on both socks but they itch my skin even after several washes and have been tumble dried too.  As my husband would say "I am a sad panda!"

The pattern is by Chrissy Gardiner and it is called mix and match rib, I got it from her book here.  I also used her anatomical toes which fit my feet better than the regular wedge shaped toes.

Toe Up 03

Bamboo Rib 1

Bamboo Rib 2

Bamboo Rib 3


I really really liked working on these and couldn’t put them down and learned a few lessons along the way.  I started them two at a time on one circular needle in the magic loop technique.  While this was fine and I could do it, I think I am happier if I work on one at a time as I felt like I was getting somewhere.  So I ordered a second circular needle so I could work on the socks separately.

When this turned up, it felt like it was bigger and I got in a blind panic thinking I had actually knitted my socks on a smaller needle than I thought I was.  After much debate I realised I had used the size I thought I was (2.5mm) but the unusual knitting style I was using (eastern uncrossed) had resulted in my gauge being 10 stitches per inch instead of the 8 stitches per inch called for in the pattern.

After some more panicking I bought a 2.75mm needle and did some swatching and got 9 stitches per inch, at this point I recalculated the pattern for this new gauge.  If I hadn’t recalculated I would have ended up with a sock that was too small.  In the end instead of starting the pattern I did some more increases to get the stitch count right, and then I started the rib pattern.

I really loved working this rib, as the bamboo ridge gave me something to count and I found I didn’t need a row counter.

When I got to the heels I followed a different way of doing short rows.  I find the conventional way of wrapping and turning very fiddly to do with such small yarns, so I followed the concept here by a lady known as Fleegle.  A warning to anyone who follows that link, the numbers she gives do not result in a heel.  To make a heel from this you need to be able to modify the numbers for your sock.

I was worried about using a short row heel as my feet have high arches but it turned out fine, the socks fit perfectly.  However, the yarn makes my feet itch and I cannot wear them for long without wanting to pull them off and scratch.  I should have known this was coming as I find my skin is easily tickled and itched by things.  As it turns out my mum is a size smaller than me and my MIL is a size bigger, and as my MIL gets cold feet frequently I am hoping these will fit her.  My only other complaint is that I have already bought some more of the same yarn brand for more socks and now I won’t be able to make them for me.  This does however give me an excuse to buy more yarn.

Oh well, it just means my MIL is getting a second pair of socks which I am sure she won't mind.   In the meantime I've got my eyes on a different brand of yarn, but I will save that chat for another day.

In the meantime heres something I made with a program I own called Electric Quilt.

Rainbow Flower

Have fun!

Wednesday 20 April 2011

Pointy Sticks of Doom!

Pointy Sticks of Doom is something my hubby would say, or to everyone else they are call Double Pointed Needles (DPN's). 

I learned to knit last summer because I kept seeing lots of beautiful things on Ravelry that I wanted to make but couldn't, so I decided to learn.  I quickly came across the concept of knitting socks but initially didn't understand why someone would do so.  However, over time I kept seeing beautiful yarn and patterns for socks and I got drawn in.

It seems the more traditional way of knitting socks is on DPN's so that's where I started, this is where the Pointy Sticks of Doom come in.  You see, having a tube of knitting with four or five six inch sticks in it, that you are expected to knit with and not hurt yourself is a bit frightening.  Now, there are other ways to knit socks without using DPN's but part of me was upset that I couldn't get the hang of them so every now and then I keep getting them out and trying again, as someone else said "its like wrestling a hedgehog!".

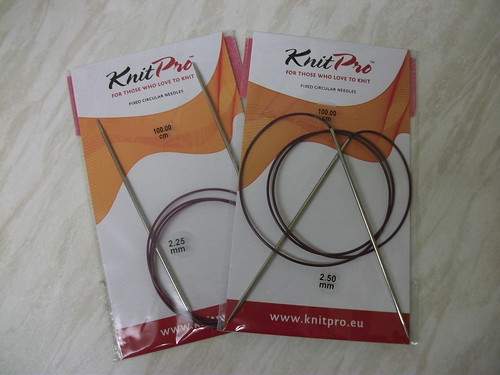
Over time I learned the other ways to knit socks, magic loop, two circular needles and even a tiny nine inch circular needle.  However each of these presented their own problems, the tiny circulars was too small to hold for instance.  As for using longer circulars (two circulars or one in magic loop style), well the amount of time it was taking me to move the stitches around from needle to cable and back again was getting me down.  That's not mentioning the fact I was knitting tightly and getting the loops over the join at the cable was tough at times.

So as a result, yet again, I got out my pointy Sticks of Doom and went to a group on Ravelry where a very nice lady was helping some crocheters learn to knit socks.  I was a late starter to all the fun but they answered my questions and made me feel welcome (Even though I was being a pain with daft questions).

With their help I figured out how to hold the DPN's so I could actually knit with them (this turned out to be very  important).  Something else they helped me with, and I feel silly for not realising it, is why I was getting ladders.  Now ladders tend to form at the point where two needles meet, the stitches look stretched out and as a result the stitches look like a ladder.  To be honest very small ladders come out in the wash but these were too big for my liking (I'm a perfectionist, or as my mum would say "your a pain!" lol)

The most common way to get rid of ladders is to knit the first stitches on every needle quite tightly, this is based on the theory that the ladder is formed because your knitting is loose at that point.  So that's what I had been doing, but oh no, it wasn't working.

The lady who was helping the crocheters to knit, suggested that my actions to prevent ladders may actually be causing them.  At first I ignored her comment, then out of desperation I tried, in effect I actually stopped trying.  That was the light bulb moment, the ladders vanished, together with the way I was holding the DPN's I now get virtually no ladders at all.  Although to be honest there are two points where you can see not a ladder, but that a column of stitches is ever so slightly looser than those around it.  Now this should come out in the wash, and I would bet chocolate that no one else could see it  (well if I could find the cable for my camera).

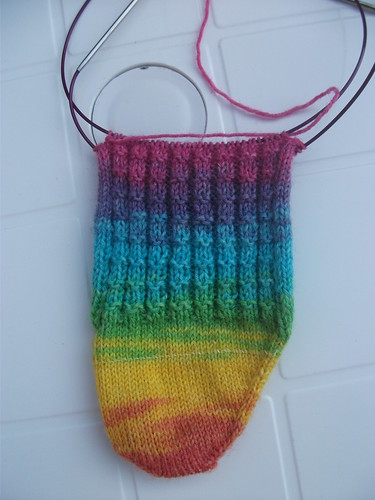
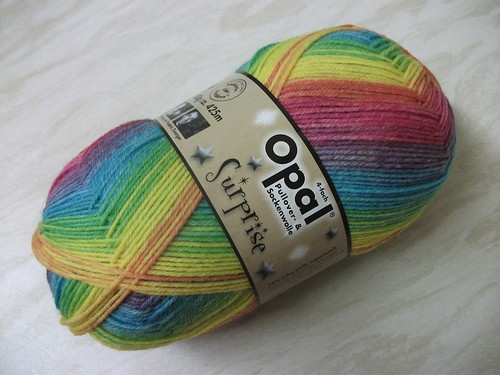
So where does this leave me?  Well I Had started my socks with my Opal yarn but with circular needles, however I'm getting ladders and gauge problems.  So I reckon I will stop and frog them and start again with Pointy Sticks of Doom!

Phew, I didnt mean to go on so long, espescially without pictures :)

Have Fun!

Tuesday 1 March 2011

My First Sock Yarn

I've been researching knitting socks for ages, even put some books on my Christmas wish list.  As it is I ended up with two books on knitting socks, both are the toe-up variety.  The thing is I've been drooling over it and researching for a few months now and decided it was time to get to it.

So here is the yarn I got, Opal Surprise 4ply.  This isn't the yarn I had planned on buying, it's a bit more expensive than I planned to learn on but when I saw it I couldn't resist the colours.  Opal is supposed to be very good quality that really lasts.

Opal Surprise 4ply

To go with it I needed some circular knitting needles (I can't get the hang of DPN's) and I figured that for Magic Looping that 40 inches would be a good length. I wasn't sure what sizes to get as I have no idea what my gauge is going to be so I opted for 2.25mm and 2.5mm (the 2.5mm is what the ball band says).   Hopefully one of these will give me a good gauge for socks as you usually work these at a tighter gauge than normal.

Fixed Circs

For now I'm just going to start knitting a swatch, first a flat one with 2.5mm needles in garter stitch to get the hang of working with tiny needles and thinner yarn.  Once I'm happy I'm going convert this sample into a tube and change to stockinette stitch with magic loop.  After I get the tube going I'm going to switch the needle size to the smaller one (leaving a mark of some kind to show where I changed).

I know more experienced knitters would just start with the sock and use that as the swatch but I'm being careful (I worry too lol).  I'm hoping that the opal won't mind being unpicked so I don't waste any.  After I get my gauge checked (and it's suitable) I can start with my socks.  I still can't decide if I will do a plain vanilla sock or a ribbing one, we shall see :)

Have Fun!

Sunday 20 February 2011

Viking!

Not long ago I found a little amigurumi on Ravelry which I knew my husband would like, he liked it so much be bought me the book "Creepy Cute Crochet".

While I was playing around he found out there was a Viking pattern on the designers website and asked if I could make one as a leaving  gift to a co-worker.  So off I went, it took me two attempts to get one that I liked, but he is cute!  He is about 3 inches tall :)


Viking 2

He doesn't have a sword in this picture as it was added later, but he turned out OK :)  As for my earlier attempt that didn't work so well?  Well it turns out my daughter loves her new "snowman" and loves throwing him around the room :)

Enjoy!

Friday 18 February 2011

Babette Construction - Section Five

Colours and Order

8.2 - saffron and meadow
4.23 - shrimp and saffron
4.21 - saffron and meadow
4.24 - shrimp and saffron
4.22 - shrimp and saffron
8.3 - matador and shrimp


section 05


Its nice seeing the green come out more, I think there's blue coming in the next section.  Having laid this out om my bed I think the finished blanket is going to be bigger than I envisioned.  I also don't think its really going to look great until near the end due to the way the colours are distributed over the blanket.

Enjoy!

Babette Construction - Section Four

Colours and Order

6.9 - shrimp and saffron
4.36 - shrimp and saffron
2.37- saffron and meadow
2.38 - shrimp and saffron
6.10 - shrimp and saffron

So far so good, I am still enjoying myself.  The JAYG is still going well too, theres no confusion as to where to start or stop - not yet anyways.  I am enjoying it so much I'm planning what to do next, either another Babette in different colours or something that utilises the JAYG.


section four

Have Fun!